ล็อกอินด้วย user ssh
Set up your default identity
- From the terminal, enter
ssh-keygenat the command line.
The command prompts you for a file to save the key in:
123$ ssh-keygen//Generating public/private rsa key pair.//Enter file in which to save the key (/Users/emmap1/.ssh/id_rsa):
Generating public/private rsa key pair.
Enter file in which to save the key (/Users/emmap1/.ssh/id_rsa): - Press the Enter or Return key to accept the default location.
- Enter and re-enter a passphrase when prompted.
- หน้าแสดงผลก็จะประมาณนี้ครับ
12345678910111213141516171819202122$ ssh-keygenGenerating public/private rsa key pair.Enter file in which to save the key (/Users/emmap1/.ssh/id_rsa):Created directory '/Users/emmap1/.ssh'.Enter passphrase (empty for no passphrase):Enter same passphrase again:Your identification has been saved in /Users/emmap1/.ssh/id_rsa.Your public key has been saved in /Users/emmap1/.ssh/id_rsa.pub.The key fingerprint is:4c:80:61:2c:00:3f:9d:dc:08:41:2e:c0:cf:b9:17:69 emmap1@myhost.localThe key's randomart image is:+--[ RSA 2048]----+|*o+ooo. ||.+.=o+ . ||. *.* o . || . = E o || o . S || . . || . || || |+-----------------+ - List the contents of
~/.sshto view the key files.
12$ ls ~/.ssh//id_rsa id_rsa.pub
Add the key to the ssh-agent
- To start the agent, run the following:
12$ eval `ssh-agent`//Agent pid 9700 - Enter
ssh-addfollowed by the path to the private key file:
12$ ssh-add ~/.ssh/<private_key_file>// ssh-add ~/.ssh/id_rsa
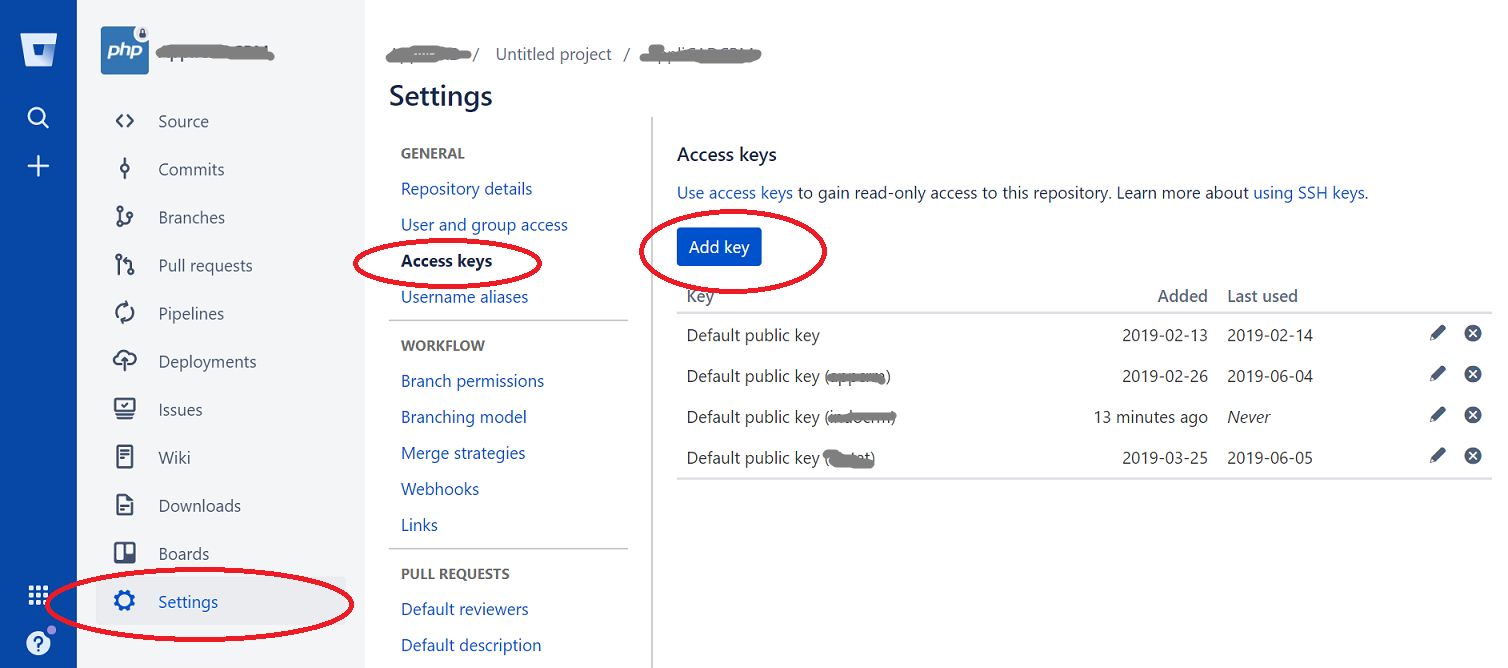
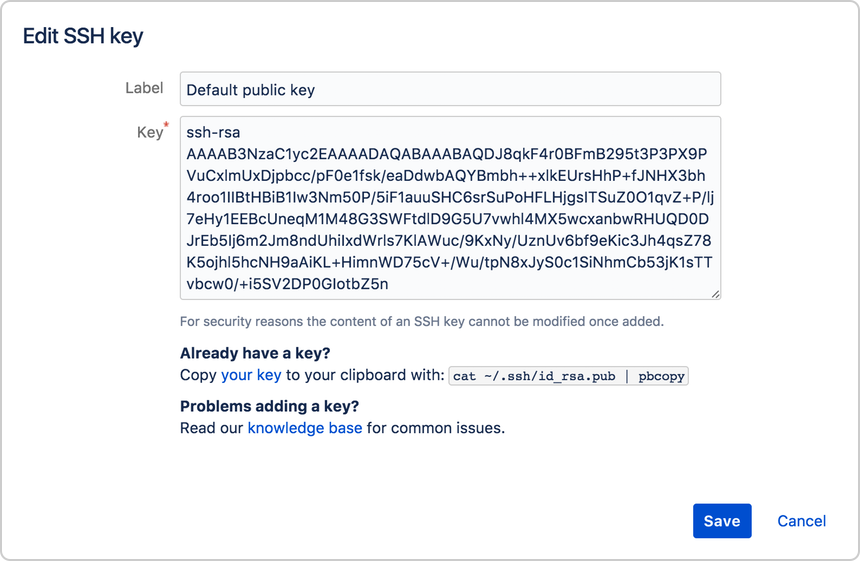
Add the public key to your Bitbucket settings
- In your terminal window, copy the contents of your public key file. If you renamed the key, replace
id_rsa.pubwith the public key file name.
1$ cat ~/.ssh/id_rsa.pub - Copy Key ไปใส่ใว้ใน Bitbucket ดังรูป


จากนั้นก็ทำการ Clone มาที่ Server
|
1 |
git clone git@bitbucket.org:project/project.git . |
* ใส่ . ตามหลังเพื่อไม่ให้ เอาโฟลเดอร์ของ Project มาด้วย
ดูเพิ่มเติม
https://serverfault.com/questions/737595/git-clone-from-bitbucket-org-on-ec2-server-using-ssh-keys
https://confluence.atlassian.com/bitbucket/set-up-an-ssh-key-728138079.html#SetupanSSHkey-ssh2