Create new custom module and relationship in vtigercrm
8 ต.ค. 2020 , 2,194 Views , หมวดหมู่ VtigerCRM Dev โค๊ดดิ้ง , ป้ายกำกับ:custom module, elationship, vtigercrmวิธีการสร้าง New Module
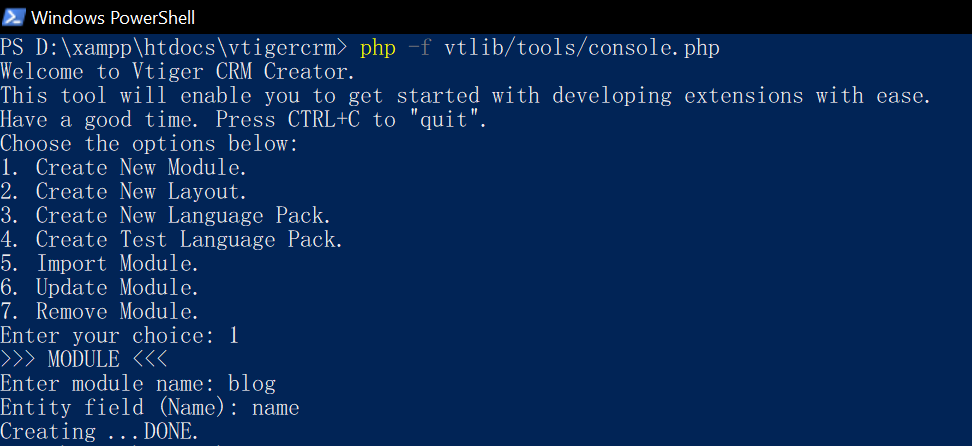
- เข้าไปที่โฟลเดอร์หลักของ vtigercrm จากนั้นกด shift+คลิกขวา แล้วเลือก Open PowerShell window here
- จะขึ้นหน้าให้พิมพ์คำสั่ง โดยให้พิมพ์คำสั่ง
1php -f vtlib/tools/console.php
กด 1 แล้ว Enter
จากนั้นพิพม์ Module name, Entity field แล้ว Enter ตามลำดับ ตามตัวอย่างดังรูป

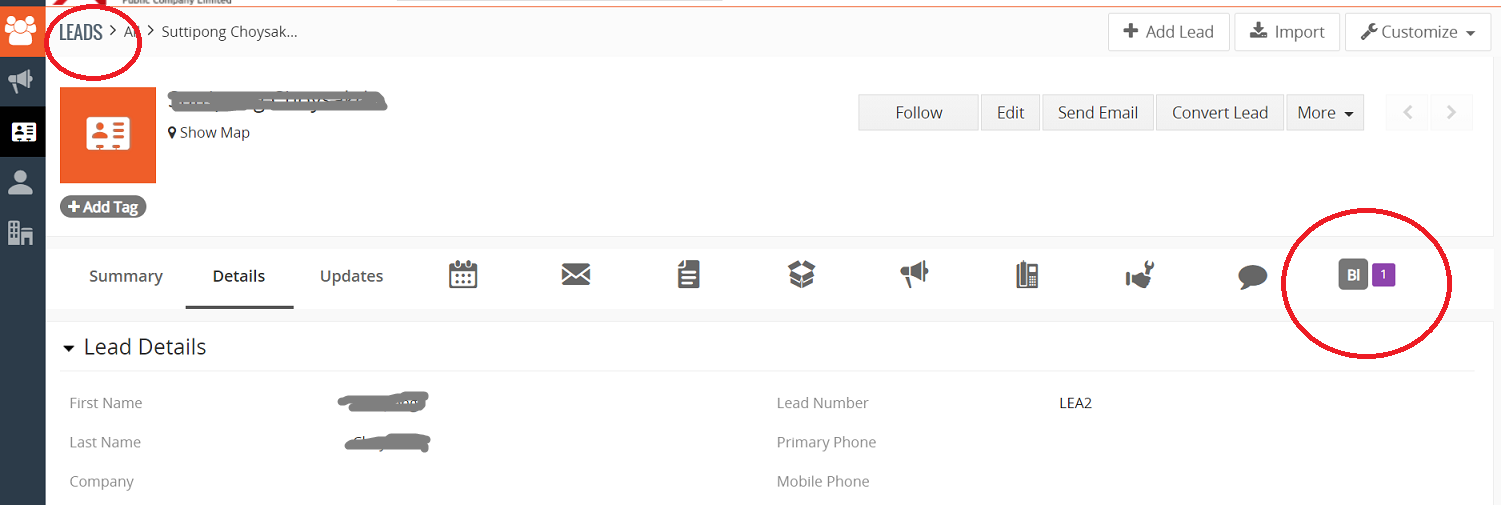
วิธีการ Add relationship กับ Module อื่น
สร้างไฟล์ create_relation.php ใว้ใน root folder ของ vtigercrm โดยเขียนโค๊ดในไฟล์ดังนี้
|
1 2 3 4 5 6 7 8 9 10 11 12 13 14 15 16 |
<?php /* create_relation.php Create this file into your root directory of vtiger i.e. vtigercrm/ and then run this file directly using your browser for example localhost/vtigercrm/create_relation.php */ include_once('vtlib/Vtiger/Module.php'); $moduleInstance = Vtiger_Module::getInstance('Leads'); $accountsModule = Vtiger_Module::getInstance('Blog');//new_module $relationLabel = 'Blog';//new_module $moduleInstance->setRelatedList( $accountsModule, $relationLabel, Array('ADD','SELECT') //you can do select also Array('ADD','SELECT') ); echo "done"; |
จากนั้นรันโค๊ดในบราวเซอร์ ตัวอย่างลิ้งค์ http://localhost/vtigercrm/create_relation.php

ตามตัวอย่างด้านบนหากจะให้ Module Leads ไปแสดงเป็น Related Module ใน Blog ในโค๊ดด้านบน ก็ให้แทนที่กันระหว่าง Leads กับ Blog แล้วก็รันโค๊ดอีกครั้ง
ที่มา
https://albracu.gitbooks.io/developer-guide/content/develop-extensions-for-vtiger/vtiger-development-library-vtlib.htmlhttps://wiki.vtiger.com/index.php/UI_Typeshttps://wiki.vtiger.com/index.php/TypeOfDatahttps://community.vtiger.com/help/vtigercrm/developers/vtlib/console-tool.html
https://stackoverflow.com/questions/44533660/how-to-add-relationship-in-vtiger-7-custom-module
ป้ายกำกับ:custom module, elationship, vtigercrm
